How To Copy Photos from iPhone 12 Pro to MacBook Air/Pro
![]() By
Tasnia Salinas, on January 25, 2021, in
iPhone Transfer
By
Tasnia Salinas, on January 25, 2021, in
iPhone Transfer
Summary: In this article, we help you to learn how to copy the entire photo library from an iPhone 12 to MacBook Air/Pro. Get the best iPhone Photo Transfer - SyncBird Pro. Make sure you have downloaded the latest version here before continuing.
100% Free & Secure Download
The perfect moment can happen at any moment, so it's good to have brilliant Triple-lens Camera on an iPhone 12 Pro. Somehow as the iPhone storage is limited, and the photo editing feature is mere comparing to Pro-level Photo Editor software, so in many cases, you may want to copy photos and videos from an iPhone 12/iPhone 12 Pro to your MacBook, MacBook Air computer. In this quick iPhone to Mac tutorial, we'll show you detailed steps on copying photos from iPhone 12 to Mac.

Best iPhone To Mac Photo Transfer
No.1 iPhone Transfer Now iOS 13.3 Ready
Best Photo Transfer for iPhone 12/11 Pro
On-demand Copying iPhone Music and Photos
Best iPhone File Transfer Shortcuts
Part 1: How To Copy Photos from iPhone 12 To Mac with Photos
You can find your entire Photo collection in both the Photos app and the Camera app on your iPhone 12. But to copy these photos from iPhone to your Mac computer may need extra tricks. We have discussed the ultimate guide article on How To Transfer Photos from iPhone To Mac, you can find several ways to accomplish this job. While we want to show you the most straightforward method to copy photos from iPhone to Mac using Photos app (pre-installed on both iPhone and Mac).
How-To Steps To Copy Photos from iPhone 12 To Mac Catalina
-
Step 1:
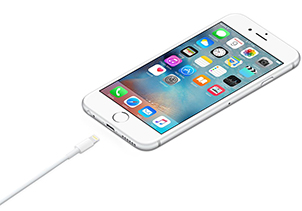
Connect iPhone 12 To Mac: If it's the first time you connect this iPhone to this Mac, you might need to unlock this device using your passcode and tap Trust This Computer.

Step 1 - Connect iPhone 12 Pro To Mac & Trust This Mac -
Step 2:
Select and Copy iPhone Photos To Mac: On your Mac (Running macOS Mojave or later), open Photos app > Device > [Your iPhone Name] > Choose Photos and Videos from New Items and Click Import to copy these pictures from iPhone to your Mac.

Step 2 - Select Photos > Copy from iPhone 12 To Mac
Part 2: How To Copy Photos from iPhone To Mac without Photos
Using the in-built Photos app to copy photos from iPhone 12 to Mac only includes the photos in Camera Roll. For these pictures that were synced from iTunes to iPhone, Photos app won't show them in panel. At this moment, you need SyncBird Pro, a newly release desktop app for your Mac that's made to copy your photos and other iOS files between your iPhones and Macs. Follow steps below to learn how to copy photos from iPhone to Mac without Photos, iTunes or other Apple services.
How-To Steps To Copy Photos from iPhone 12 To Mac with SyncBird Pro
-
Step 1:
Connect your iPhone to your Mac with a USB cable > Download and Open SyncBird Pro on your Mac (runs on macOS Catalina and all recent Mac OS).

Step 1 - Copy Photos from iPhone 12 To Mac without Photos -
Step 2:
Go Photos (including video recording) > Choose the photos and videos in SyncBird Pro > Copy To Mac:

Step 2 - Copy Photos from iPhone 12 To Mac without Photos -
Step 3:
After a while, SyncBird Pro will finish copying photos from this iPhone 12/iPhone 12 Pro to your Mac.

Step 3 - View Copied iPhone Photos on Mac
The Bottom Line
Another advantage of using SyncBird Pro to get photos offloaded from iPhone to Mac is for its ability to sort a messed photo library to clearly organized categories. If you need further iPhone To Mac Photo Transfer solution, it's suggested to get SyncBird Pro. Download Free Trial >

SyncBird Pro
Version 3.0.8 (March 25, 2020) / Support iOS 4 - iOS 13
Category: iPhone Transfer
More iPhone iPod Photo Transfer Tips
- 3 Methods To Transfer Photos from iPhone To Mac with USB >
- How To Import Photos from iPhone To Windows 8 >
- How To Transfer Bulk Photos from Windows 10/8 To iPhone >
- How To Export Pictures from iPhone Xs/Xr To PC >
- Can I Transfer Photos from iPhone To PC Using iTunes >
- How To Transfer iPhone Photos to Mac without USB >


