The iPad is transforming our lives. It is able to support music creation, movie filming, software engineering, photo/video editing, and so on. It's hard to believe but Gorillaz's 2010 album, The Fall, was created almost exclusively using the iPad. The music video "Rouge" was filmed entirely on an iPad.
If you use your iPad frequently, probably you'll face an issue that how can I transfer files from a Mac computer to my iPad? iTunes, AirDrop, Files app for iOS 11, iCloud, which one should I choose to send my files from Mac to iPad? We are going to show you a complete guide on how to transfer all types of your files from Mac computer to your iPad.
Table Of Content:
- Part 1: FAQs About How To Transfer Files from Mac To iPad
- Part 2: How To Transfer Files from Mac To iPad with iTunes
- Part 3: How To Transfer Files from Mac To iPad with AirDrop
- Part 4: How To Transfer Files from Mac To iPad with iCloud
- Part 5: How To Transfer Files from Mac To iPad with Files for iOS
- Part 6: How To Transfer Files from Mac To iPad with SyncBird
Part 1: FAQs About How To Transfer Files from Mac To iPad
Many options are available to help you get your file transferred from a Mac computer to your iPad. The hard part is how to make the best choice per your specific situation. Here are some FAQs about how to transfer files from Mac to an iPad that may give you a head start (Also Learn How To Transfer Photos from iPad To Computer).
- Q: Can I transfer files from Mac to iPad without iTunes? A: Yes. Both Apple and third-party apps offer plenty of options that may help you transfer your files from Mac to your iPad without iTunes. You can use AirDrop, Files app for iOS, SyncBird Pro or other Mac To iPad File Transfer solutions.
- Q: How do I transfer files from Mac to iPad wirelessly? A: By using iCloud, AirDrop, Google Drive, or Files app for iOS, you don't have to connect your iPad to your Mac with a USB cable. They work wirelessly.
- Q: How do I transfer a folder from Mac to iPad? A: You can create folders and transfer them from your Mac to your iPad with iCloud Drive. It's easy to do so: Click on the Finder icon in your Mac dock > iCloud Drive > Right-click the mouse inside the Finder window > New Folder > After creating the new folder, put your files in it and it will sync to your iPad simultaneously.
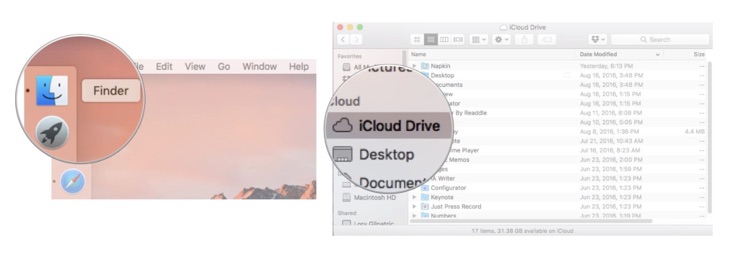
How To Transfer a Folder from Mac to iPad
Top 5 Ways To Transfer Files from Mac To iPad
| iTunes | AirDrop | iCloud | Files | SyncBird | |
|---|---|---|---|---|---|
| Transfer Music To iPad | |||||
| Transfer Photos To iPad | |||||
| Transfer Videos To iPad | |||||
| Transfer PDF To iPad | |||||
| Transfer Document Files | |||||
| Wireless Transfer | |||||
| Free Up Space On iPad | |||||
| Two-Way Transfer | |||||
| Not Require iPad Backup | |||||
| Not Require iTunes Sync | |||||
| Not Require iCloud Account |
Part 2: How To Transfer Files from Mac To iPad with iTunes
iTunes is the "Old School" iPad file manager utility that comes with every Mac. Before iCloud getting wildly adopted, iTunes is the only way to manage files between your Mac and iPad. Here are three commonly used Mac To iPad file transfer methods with iTunes.
Transfer Files from Mac to iPad with iTunes:
- Method 1: You can transfer Music, Movies, Photos, TV Shows, Audio Books, Podcasts (iTunes U) from Mac to your iPad with iTunes Sync. To do so: Open iTunes > Connect your iPad to your Mac with a USB cable > Click iPad tab on iTunes > In Summary, click Sync to start moving content from Mac to your iPad.
- Method 2: If you want to transfer files from Mac to particular apps on your iPad, you can use the File Sharing in iTunes: Open iTunes > Navigate to your iPad > File Sharing > Find the app you need to add files > Click Add to start moving files from Mac to that iPad app:
- Method 3: If you have contacts, notes, messages, Safari bookmarks in previous iOS device backup, you can transfer these data from Mac to your iPad by using iTunes backup: Open iTunes > Your iPad > Summary > Backups > Restore Backup > Choose a Backup copy you want to restore your iPad from > Click Restore to start.
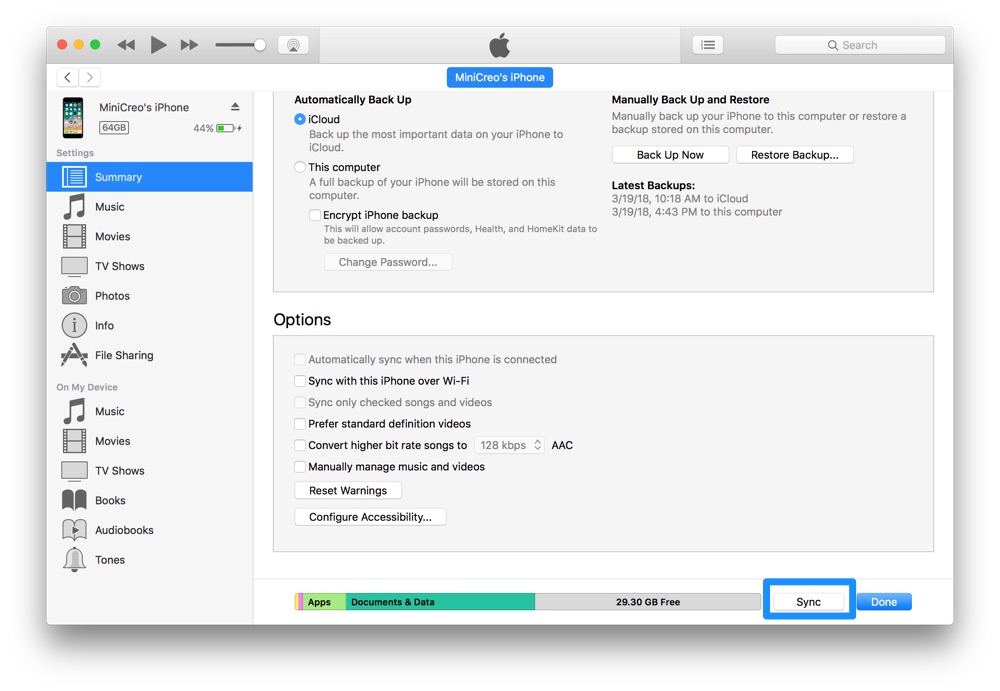
Transfer Files from Mac to iPad with iTunes Sync
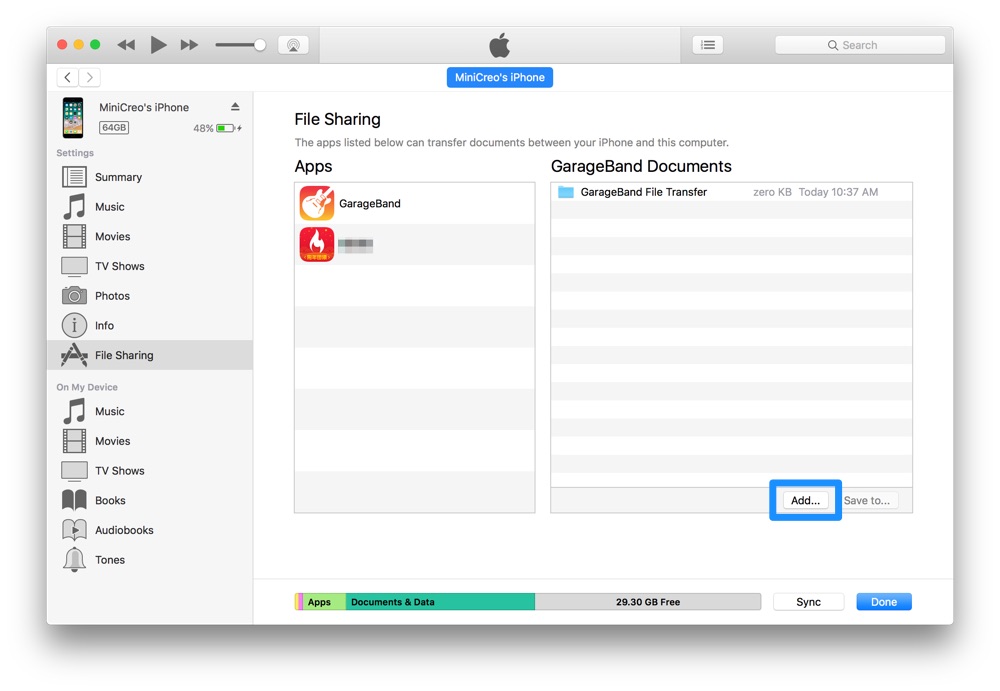
Transfer Files from Mac to iPad with iTunes File Sharing
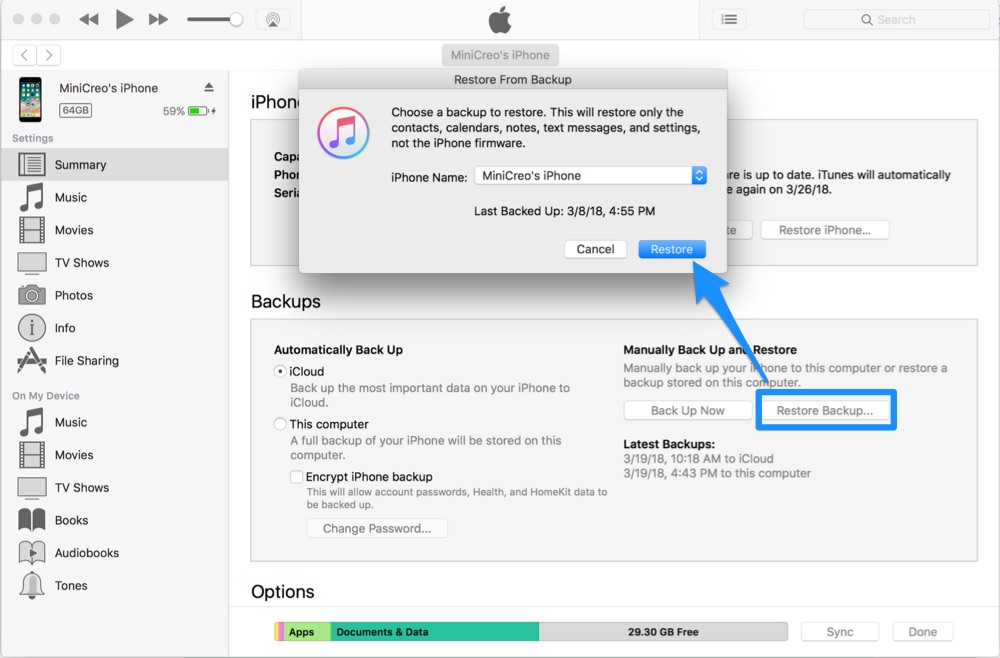
Transfer Files from Mac to iPad with iTunes Backup
Part 3: How To Transfer Files from Mac To iPad with AirDrop
AirDrop is an instant and wireless way to transfer files from Mac to your iPad. With AirDrop, you can easily share your photos, videos, documents, and more between your Mac and iPad nearby.
It's easy to do so: On your Mac, open Finder > AirDrop > put your iPad in the same Wi-fi network with your Mac > When you see your iPad icon/logo appears in AirDrop panel, drag and drop the file to the iPad icon > and then you can accept that file on your iPad:
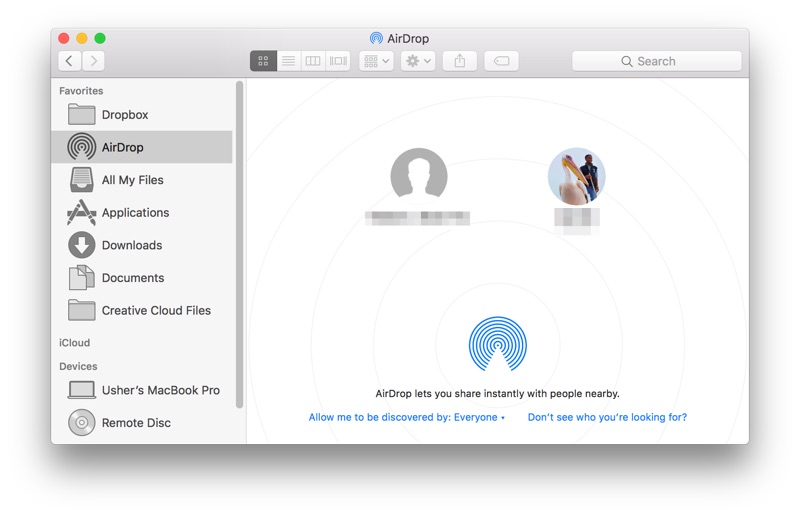
Transfer Files from Mac to iPad with AirDrop
Can't See Your iPad in AirDrop? Here Are Some Quick Tips:
- Check that both of your iPad has Wi-Fi and Bluetooth turned on.
- Make sure that both your Mac and iPad are close by.
- Check if you have set both your Mac and iPad's AirDrop receiving setting to Everyone.
Part 4: How To Transfer Files from Mac To iPad with iCloud
If your Mac and iPad use the same Apple ID, and you've enabled iCloud on both side, by default you will get your Mail, Contacts, Calendars, Reminders, Safari Data, Notes, Photos and App Documents and Data automatically synced between your Mac and iPad:
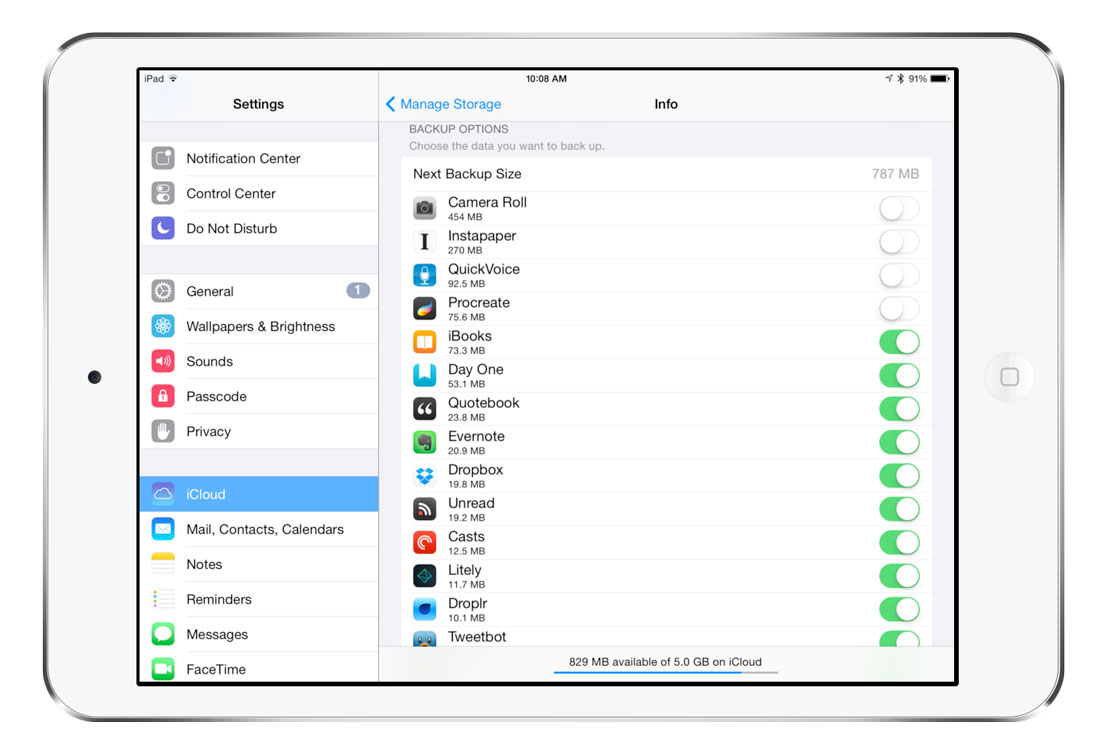
Transfer Files from Mac to iPad with AirDrop
Part 5: How To Transfer Files from Mac To iPad with Files App for iPad
The Files app for iOS 11 can seamlessly transfer all types of files between your Mac and your iPad. You can easily browse, search, and organize all your files in one place. It also goes beyond the limit of iCloud, you can sync files between a Mac and an iPad even they are using Google Drive, Dropbox, or other third-party cloud services.
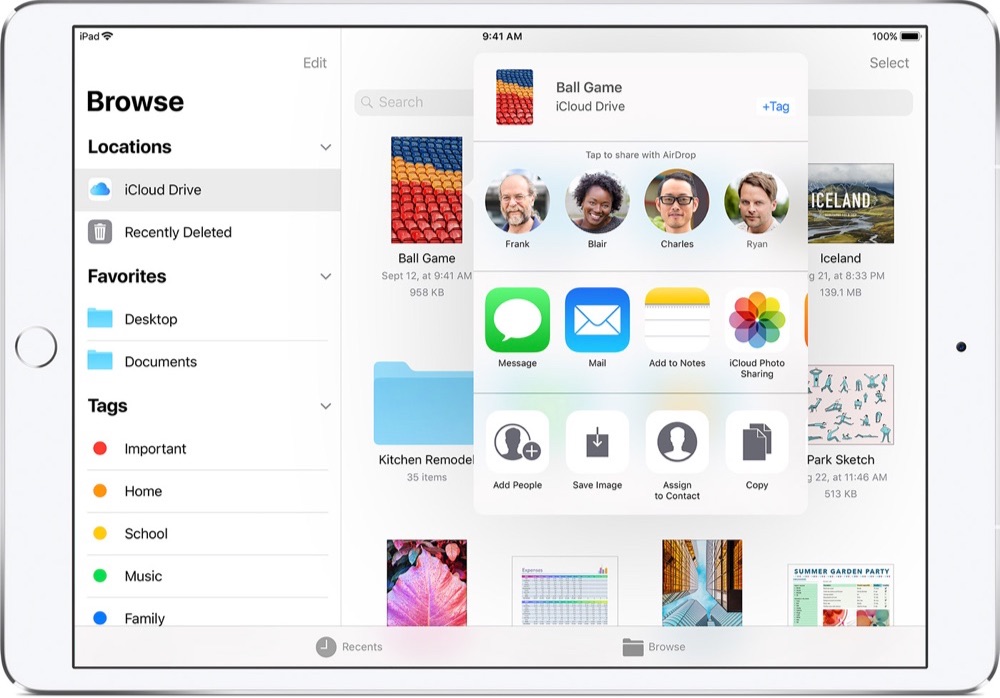
Transfer Files from Mac to iPad with Files App for iPad
Part 6: How To Transfer Files from Mac To iPad with SyncBird
As you can see, there are more than enough means to transfer files from Mac to an iPad. The only unhappy thing is that, either way mentioned above could suit every scenario. Like AirDrop cannot send songs to Music app on iPad; iCloud and Files app requires the same Apple ID and the extra storage is not for free.
SyncBird is professional iPad File Manager software that comes to fill the gap perfectly. Similar as iTunes, SyncBird is a desktop app and works for transfer your music, videos, TV Shows and other media content from your Mac computer to your iPad. The best part is, it won't erase existing content on your iPad, which means you can add songs, photos, movies and ringtongs from any iTunes Library, on any Mac.
Adding files from Mac to iPad with SyncBird is easy:
- Step 1: Download and install SyncBird Pro on your computer > Open SyncBird Pro.
- Step 2: Connect your iPad to your Mac computer > On the left side of SyncBird, click Device > Choose a catagory you'd like to import file from:
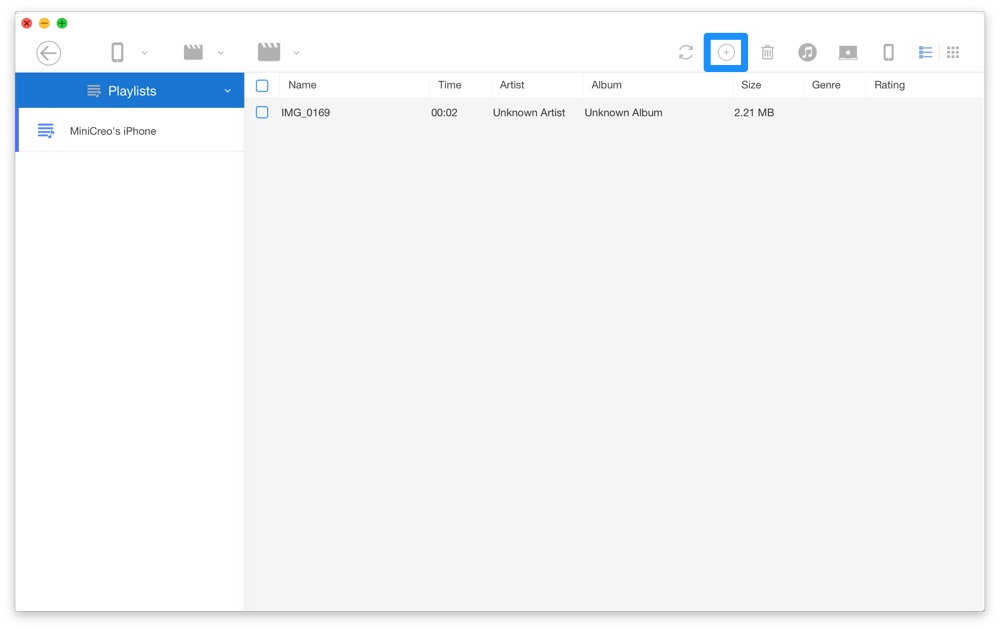
- Step 3: Click Add button and choose files you want to import to your iPad > Click Open to start transferring.
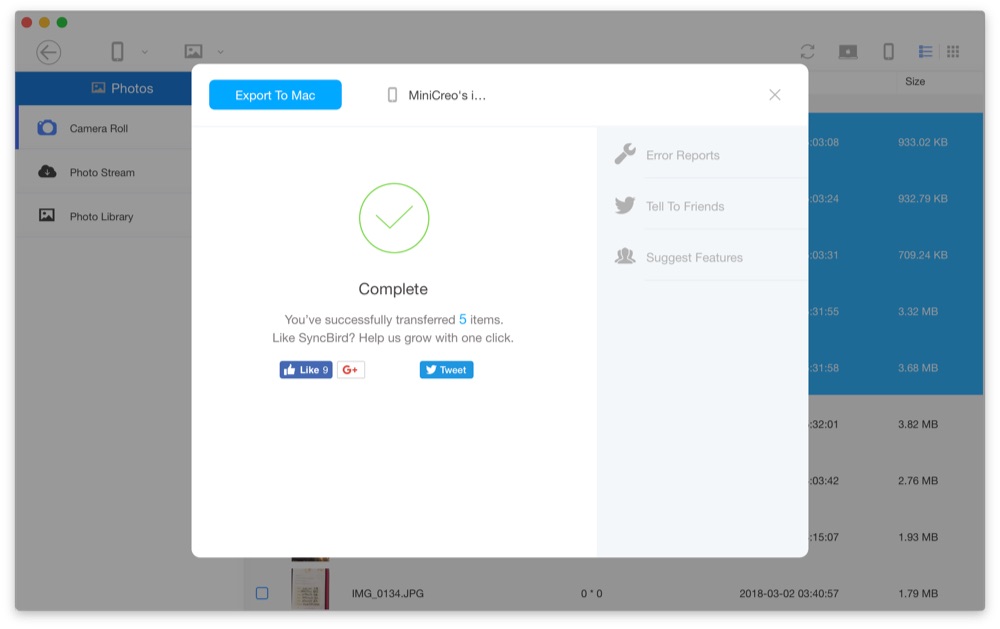
- Step 4: After a while, SyncBird will finish importing files from Mac to your iPad. In result window, you'll see:
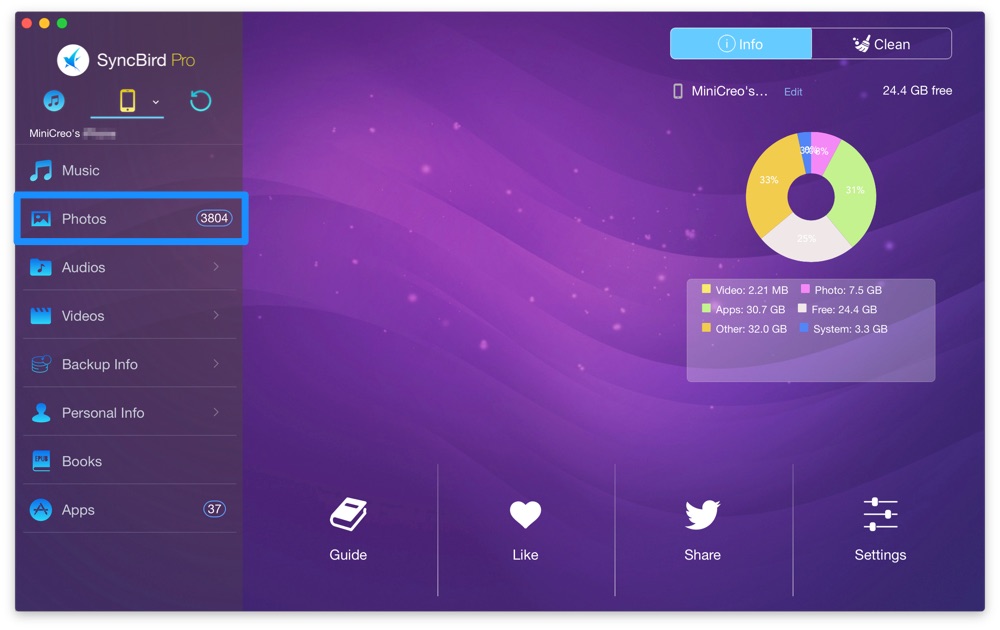
How To Transfer Files from Mac To iPad without iTunes
How To Transfer Files from Mac To iPad without iTunes
How To Transfer Files from Mac To iPad without iTunes
The Bottom Line
Have you transferred your files from Mac to your iPad with our suggestions above? If you still have questions, just drop a line in comment box below and we'll prepare more specific solutions per your situation. One more thing, if you need a complete iPad, iPhone and iPod content management solution, SyncBird Pro is definitely your best choice. Click for free download >
More iPad/Mac Related Tips
- Complete Guide On How To Backup iPad to iCloud/iTunes/More >
- How To Export Contacts from iPhone To CSV Or Excel File >
- How To Transfer iOS Notes from iPhone X/8/7/6S >
- 2018 The Best Way To Transfer Photos from iPad To Computer >
- Best Ways To Transfer Photos from iPhone X To Computer >
Tags: iPhone Tricks iTunes Alternative iPad File Transfer iPhone Photos

